Guided Surgical Kit
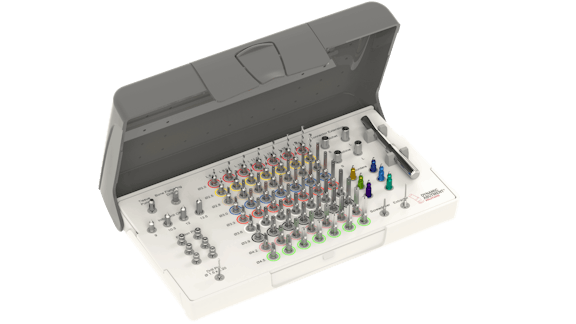
The kit includes guided surgical drills, dedicated drivers, and mounting devices for guided surgery. All the components are organized in order to make the workflow easier.

Guided DAS Surgical Kit
The GUIDED DAS SURGICAL KIT is designed for use with a wide range of implant systems, following the drill sizes and lengths provided in the kit. It is one of the most versatile guided surgical kits available on the market. The kit includes guided surgical drills, dedicated drivers, and mounting devices specifically for guided surgery.
-
Universal Kit
For all implant systems (max. Ø 4,7mm).
-
100% guided drill system
-
Full guided workflow
Relating to Dynamic TiBase and Multi-Unit DAS System
Surgical Kit Components

Tissue Punch
The tissue punch is used to create a minimally invasive circular incision in the soft tissue around each planned implant site. This tool produces a 3 mm diameter mucotomy before drilling, typically when employing a flapless surgical technique. The punch is guided directly by the guide sleeve.

Bone Flattening Drill
The bone flattening Drill is used to flatten the surface of the alveolar crest, and the remaining soft tissue on the alveolar crest is removed after using the tissue punch.

Initial Drill
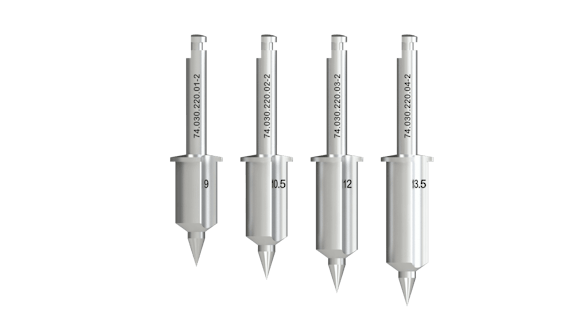
The initial drill removes the mucosa cut by the mucotomy and prepares the cortical bone for the passage of the first drill. The initial drill is marked with the offset and the reference, it is always guided directly by the guide sleeve. Available offsets 9/ 10,5/ 12/ 13,5 (mm).

Drills
Built-in stoppers ensure precise and accurate drilling to the desired depth. The different drills diameters and lengths allow doctors to plan and decide which is the best solution before starting surgery.

Anchor Pin
The fixation pin fixes the surgical guide into position. The pin must be pushed all the way along the sleeve.

Anchor Drill
The drill pin cuts at the tip and is beveled at the edges. The drill should pass completely through the sleeve to guarantee that the pin grips firmly.

Sleeves
Once fixed to the surgical guide, it allows the guided drilling sequence and the placement of the implant in the planned position.

Implant Mount
The implant mount connects to the implant by means of the clamping screw and goes in the direction and to the depth of the implant through the surgical guide. Thanks to the lateral cuts of the stop zone on the implant mount you can also check the position of the connection of the implant through the surgical guide.

Short & Long Extensions
Extension for connection between the torque wrench and the implant mount.

Screwdriver
Screwdriver to tighten the screw of the implant mount and other screws Hex. 1.20 mm

Extractor
This tool is to be used to separate the implant mount in cases when it becomes lodged using the following instructions


